Introduction to the COMSOL Desktop®
Welcome to Part 1 of our course on navigating the COMSOL Multiphysics® user interface (UI). We begin by introducing you to the COMSOL Desktop®, which is the umbrella term for the various components comprising the COMSOL Multiphysics® UI. Knowing your way around the COMSOL Desktop® is essential for when you build and modify models and apps. Below is an explanation of the major components you'll find in the COMSOL Multiphysics® UI, including terminology that you will see throughout our online materials and documentation.
COMSOL Desktop®
Model Builder, Application Builder, and Model Manager Workspaces
The COMSOL Desktop® consists of three workspaces: the Model Builder, Application Builder, and Model Manager. The Model Builder workspace contains all the functionality and operations for building, solving, and visualizing the results of your models. The Application Builder workspace contains all the functionality for creating simulation apps based on models built in the Model Builder. The Model Manager workspace, introduced in COMSOL Multiphysics® version 6.0, contains functionality for storing, versioning, and searching for models saved to local or server databases.
 A screenshot of the Model Builder with the thermal microactuator model open.
 A screenshot of the Application Builder with a thermal microactuator app open.
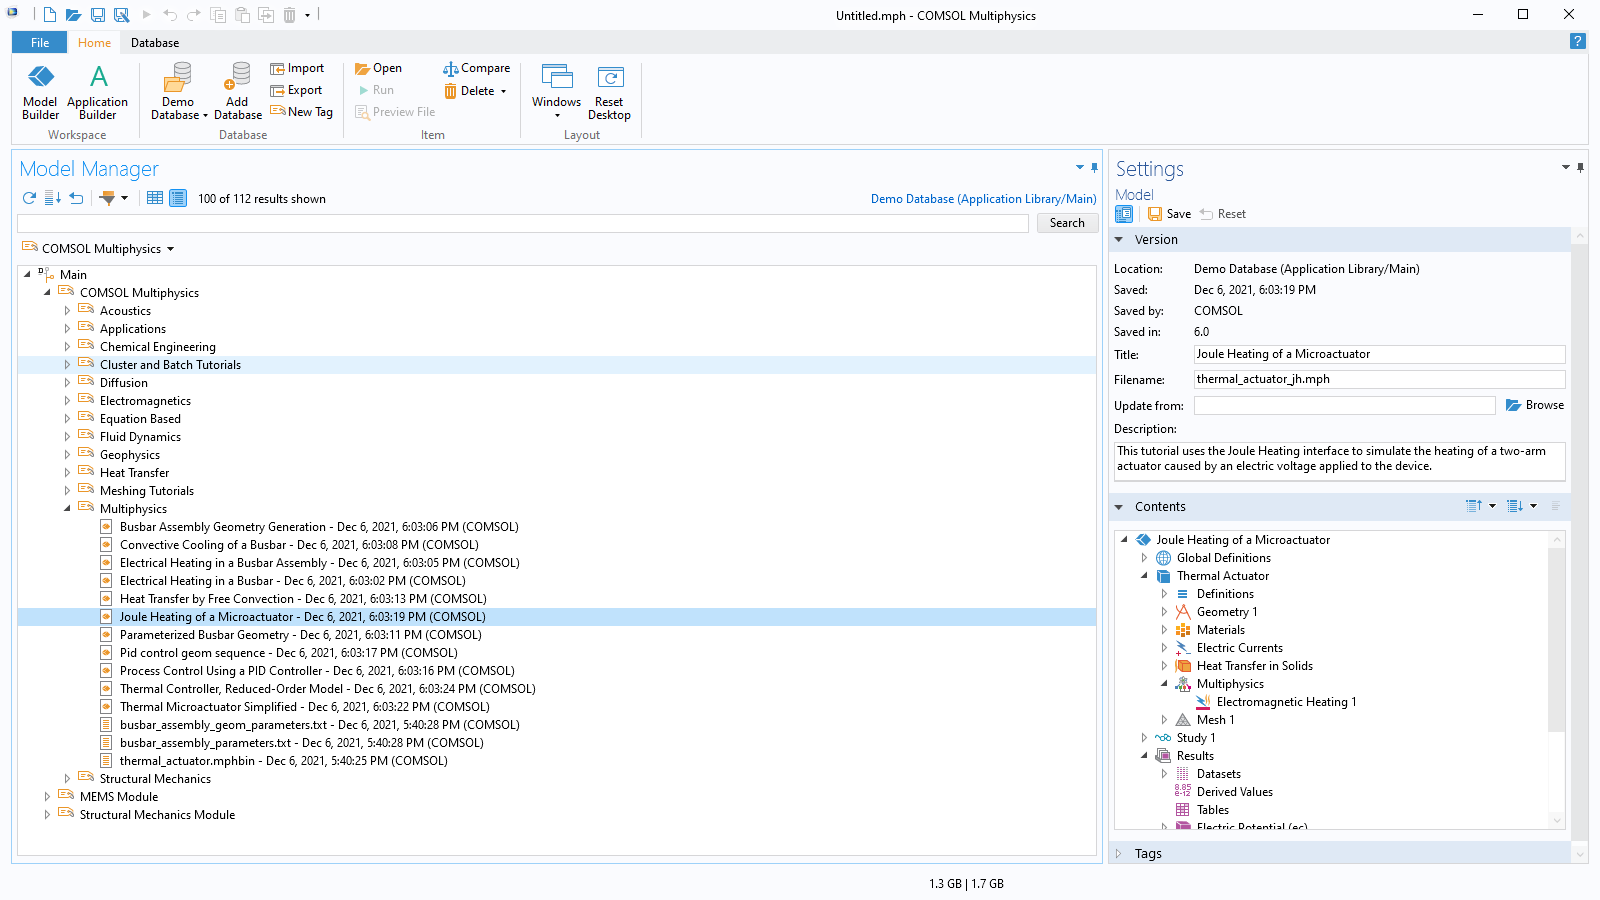 A screenshot of the Model Manager with a list of models open and the thermal microactuator model highlighted.
The Model Builder workspace with the thermal microactuator model open (left), the Application Builder workspace with the thermal microactuator model open and a simple app being built (center), and the Model Manager workspace showing a number of models, including the thermal microactuator model (right).
COMSOL Windows, Toolbars, and the Ribbon
Within each workspace, there are windows, toolbars, and ribbon tabs tailored for the purpose of said workspace. There is a primary window for each workspace with a corresponding name: the Model Builder window, the Application Builder window, and the Model Manager window. The Model Builder and Application Builder windows use a tree structure to display each item added to your model or application. A Settings window can be opened for each node to define the operations and properties specific to that node.
Beyond the three primary windows and the Settings windows, there are numerous other windows that you may encounter in the workspaces. Most windows have a toolbar within them that contains buttons with functionality related to that window. The Graphics window, one of the prominent windows in the Model Builder workspace, is used to show a graphical view of the geometry, mesh, and results of the model. The toolbar for the Graphics window has extensive features to change the view and interact with the model.
If you are a Microsoft® Windows® user, the ribbon is also a part of the COMSOL Desktop® and is one of multiple ways to build and interact with your model. The ribbon appears horizontally along the top of the software, regardless of which workspace you are in, and groups different actions together. On macOS and Linux®, the software has a toolbar along the top, which is organized slightly differently but allows you to build and interact with your model in a similar way.
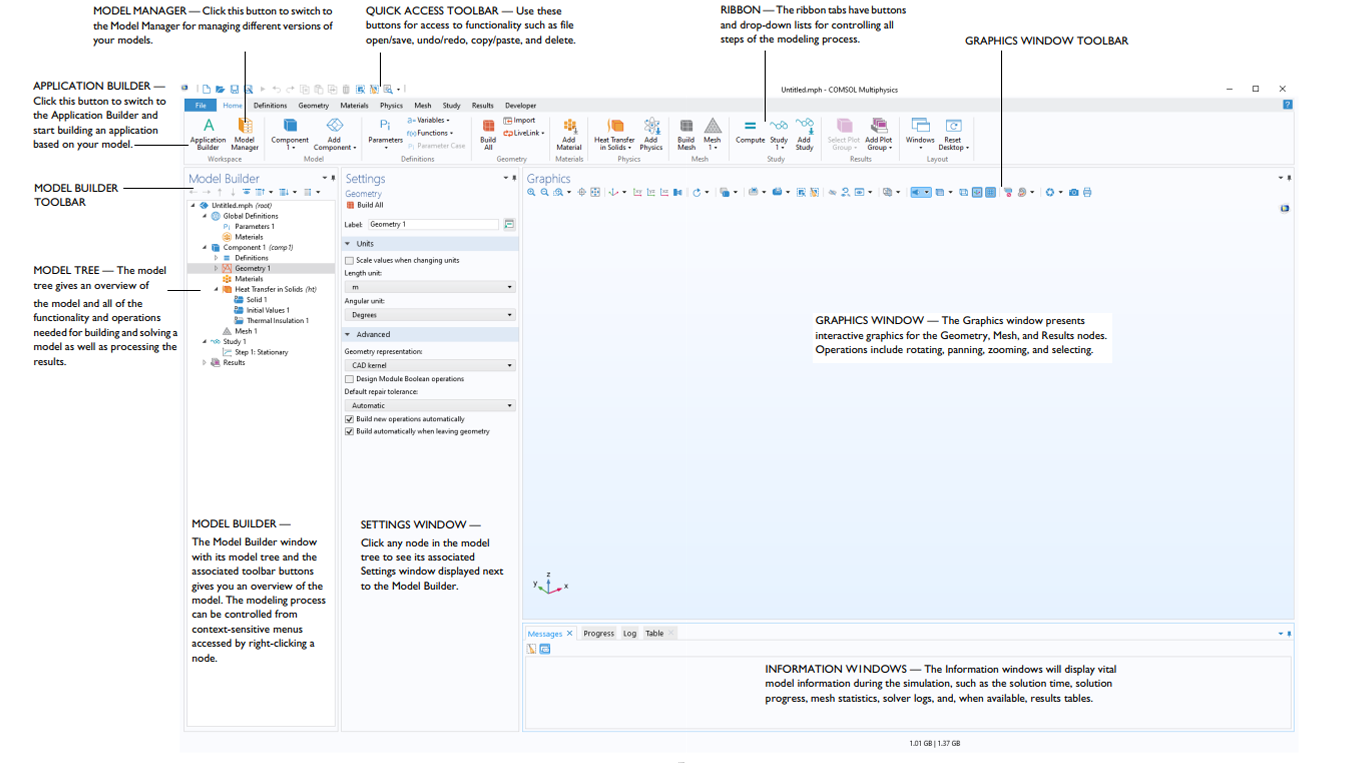 A screenshot of the Model Builder in the COMSOL Desktop, with annotations explaining the windows, toolbars, and ribbon.
COMSOL Desktop® Model Builder workspace with an explanation of the different windows, toolbars, and ribbon.
Functionality for Ease of Use
The COMSOL Desktop® contains additional menus, shortcuts, and other built-in functionality that help increase efficiency when using the software. The Model Wizard and Form Wizard are two great examples that intuitively jumpstart creating models and apps from scratch. The Model Wizard guides you through basic steps that are common to all models: selecting a space dimension, the physics interface, and the study. The Form Wizard similarly gives you appropriate prompts for starting to build an app.
More examples of built-in functionality are autocompletion, context menus, and keyboard shortcuts. Autocompletion helps you, across the software, find expressions relevant to your simulation. The context menus, accessed by right clicking in the Graphics window, bring up a menu to access operations that can be applied to the geometry, depending on what you have selected. And, of course, there are keyboard shortcuts for operations within the software that can allow experienced users to perform repetitive tasks quickly.
Watch this video to start to get acquainted with and learn how to use the COMSOL Desktop®. You can follow along with your own model or the exercise file attached, if a hands-on approach helps you learn. Once you have watched the video, continue on in the course to keep learning.
Tutorial Video: Navigating the COMSOL Desktop®
Submit feedback about this page or contact support here.