How to Upgrade COMSOL Multiphysics® with an NSL
This guide explains how to upgrade to a new major version of COMSOL Multiphysics® using a Named Single-User License (NSL), which is tied to a user who can install COMSOL Multiphysics® on up to four of their personal machines. Upgrading with an NSL is largely the same as a fresh installation, with a few caveats.
If you need to update your current installation, rather than upgrade to a new major version, see "How to Update Your Current Version of COMSOL Multiphysics®".
NSL Upgrade Steps
Upgrading with an NSL is equivalent to performing a fresh installation on Windows® or macOS. On Linux®, there are additional steps required because a local installation of the license manager is required. Regardless of your operating system, you can keep multiple versions of COMSOL Multiphysics® installed on your computer at the same time.
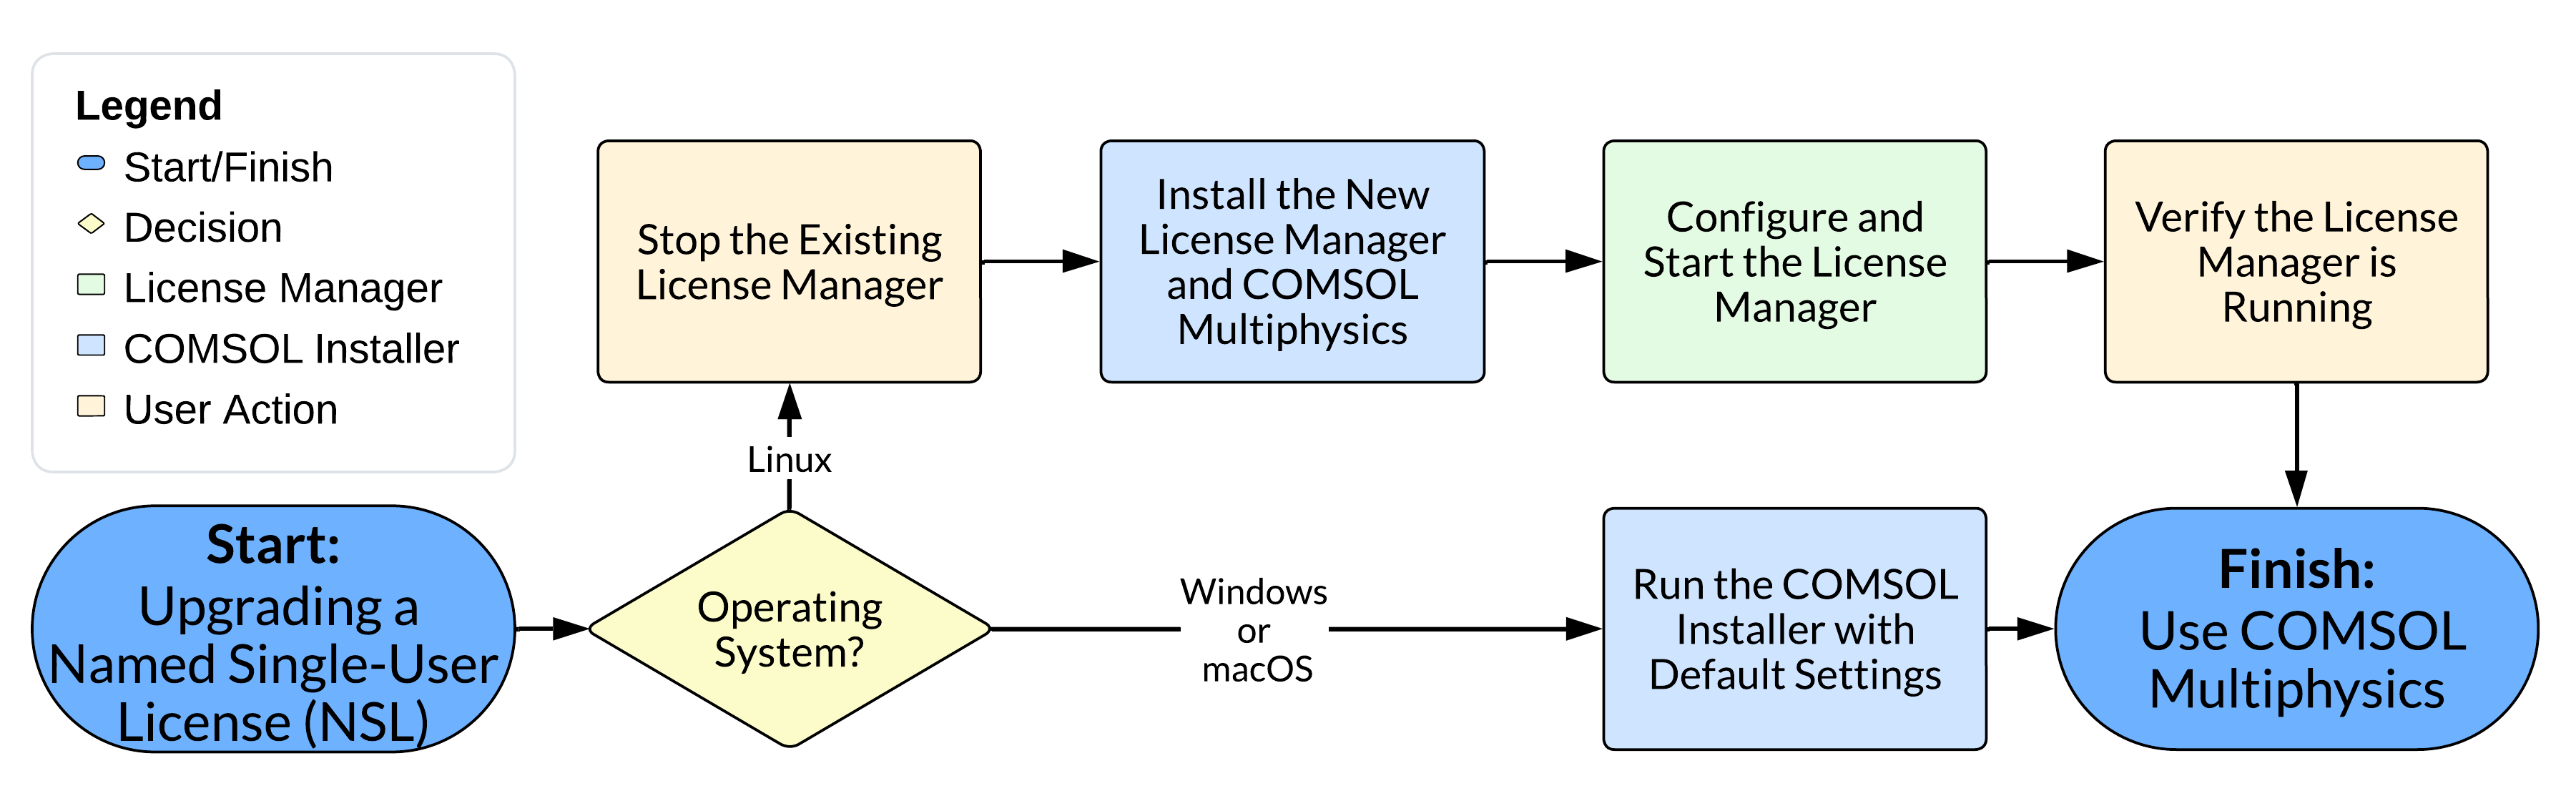 A colored flowchart of the Named Single-User License upgrade steps per operating system.
A visualization of the differences for Windows®, macOS, and Linux® when upgrading COMSOL Multiphysics® with a Named Single-User License.
A colored flowchart of the Named Single-User License upgrade steps per operating system.
A visualization of the differences for Windows®, macOS, and Linux® when upgrading COMSOL Multiphysics® with a Named Single-User License.
Prepare to Upgrade COMSOL Multiphysics®
Before proceeding to the following parts, confirm you have the latest license file (license.dat), which is sent via email to the designated contact in your organization when a new version is released. If you do not have access to this file, reach out to the person who received the email and ask for the latest license.dat file.
NSL Upgrades on Windows® and macOS
Use the installer for the new version to complete a fresh installation. See "How to Install a Named Single-User License (NSL)" for more information.
Note: On Windows® and macOS, no additional setup is required after installation. For Linux®, please review the following section before getting started.
NSL Upgrades on Linux®
On Linux®, COMSOL Multiphysics® installations rely on a license manager. The license manager must be stopped using the process matching how it was started, as a standard process or as a
systemdservice. A fresh installation can then proceed.
Stop the License Manager
-
How was the License Manager Started?
-
Started as a standard process
-
Open a terminal and move to the directory containing the old license manager binaries.
For a typical installation, the command is:
cd {COMSOLInstallationDirectory}/license/glnxa64Note: Remember to replace {COMSOLInstallationDirectory} with the actual path to your COMSOL installation directory.
-
Stop the license manager by running the command:
./lmdown -c ../license.datNote: Adjust the path to license.dat if your old license file is not located one directory level up from the binaries.
-
Open a terminal and move to the directory containing the old license manager binaries.
For a typical installation, the command is:
-
Started as a
systemdService (often named lmcomsol)-
Open a terminal and use the
systemctlcommand:systemctl stop lmcomsol
-
Open a terminal and use the
-
Started as a standard process
Run the Installer on Linux®
- Choose New COMSOL Installation and enter your license and user information on the license page.
- Select the license manager and COMSOL Multiphysics® (default product selections).
- Install your selected products.
See "How to Install a Named Single-User License (NSL)" for guidance on fresh installations.
After Closing the Installer on Linux®
- Verify that the license manager is running by referring to "How to Start the License Manager for COMSOL Multiphysics®".
You may begin using COMSOL Multiphysics® when the software is communicating with the license manager.
Submit feedback about this page or contact support here.