Add-ins, or add-in programs, are user-defined extensions to the COMSOL Multiphysics software that make it possible to create and package custom functionality. Add-ins can be used to speed up the modeling process by automating common modeling tasks and reducing the risk of modeling mistakes. You create add-ins using the powerful user interface building and programming tools available in the Application Builder.
Editor’s note: This blog post was updated on July 22, 2024, to reflect new features and functionality in version 6.2 of the COMSOL Multiphysics® software.
Settings Forms and Method Calls
Add-ins are made up of three constituent parts: methods, forms, and ribbon tabs — all of which are created with the Application Builder. Originally, the Method Editor solely included functionality for creating simulation apps, but thanks to updates introduced in the last few releases of the COMSOL® software, the Method Editor can now also be employed to create and use methods and forms for add-ins. This enables creating user-defined functionality accessible from custom user interfaces, thereby enhancing the modeling workflow in the Model Builder. Let’s briefly recap what methods and forms are, starting with methods.
Methods are programs that you create in the Application Builder using the Method Editor, based on the Java® programming language. They enable you to create custom functionality for performing complex operations (e.g., functionality for results evaluation and visualization). In order to learn how to use methods, you don’t have to read the manual: Just click Record Code in the user interface, perform your wanted operations in the Model Builder, stop recording, and start modifying the automatically generated programming code.

The Method Editor is used to write methods for actions not covered by the standard use of the Model Builder tree nodes.
You can, of course, have multiple methods representing the various tasks in a custom workflow. To organize the workflow, you can create your own specialized user interfaces in the Application Builder using the Form Editor. Such a user interface can be made available in the Model Builder either as a Settings Form or as a modal dialog.

The Form Editor is used for creating user interfaces containing forms and form objects, such as input fields, buttons, and combo boxes.
Learn more about creating methods, forms, and applications in this selection of blog posts.
Earlier versions of COMSOL Multiphysics® didn’t let you reuse methods and forms used in the Model Builder between sessions or between different users. You could, of course, create a simulation application for this purpose. Now, you can create add-ins, collections of methods, forms, and ribbon tabs, and store them in an add-in library for reuse in a new modeling session. COMSOL Multiphysics also comes with built-in add-in libraries. For the add-ins in the built-in library, you can review their Application Builder settings, including forms, methods, and ribbon tabs, to quickly learn how to build your own add-ins. Let’s have a look at how to create an add-in based on methods and Settings forms.
Creating an Add-In in COMSOL Multiphysics®
Creating an add-in is similar to creating an application, with a few differences. Add-ins do not have their own Graphics window, but instead use the main Graphics window in the Model Builder. An add-in should work, or give controlled error messages, for any type of model. To create an add-in, start from a form that you have created in the Application Builder and click Add-in Definitions in the ribbon, as shown below.
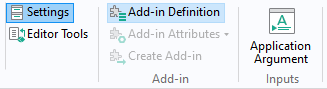
The Add-in Definition button in the ribbon.
Right-click the Add-in Definition node in the application tree and select Form Definition.
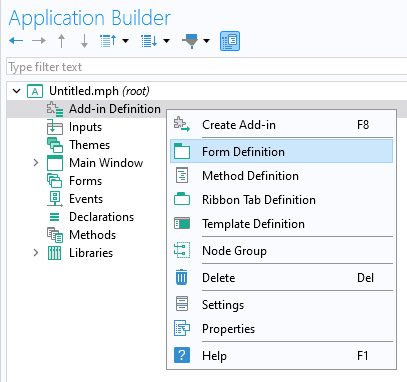
Creating a form definition for an add-in.
The figure below shows the Form Definition window. Here, you can add a label for the add-in form as well as select which form to use for the add-in. The Label will be displayed in the user-defined add-in library. You can select whether the form should be displayed as a Settings form in the model tree or as a Dialog. The Allow multiple settings forms checkbox is used to allow for more than one instance of the Settings form in the model tree. The Description is displayed in the add-in library and as a tooltip when choosing among add-ins in the ribbon.
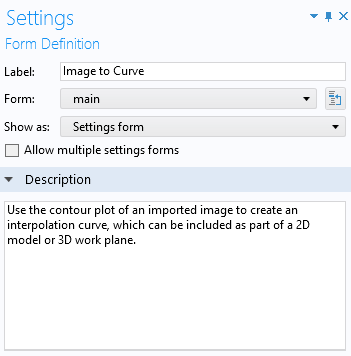
A Form Definition window.
Click the Add-in Definition node to see its Settings window, as shown below.
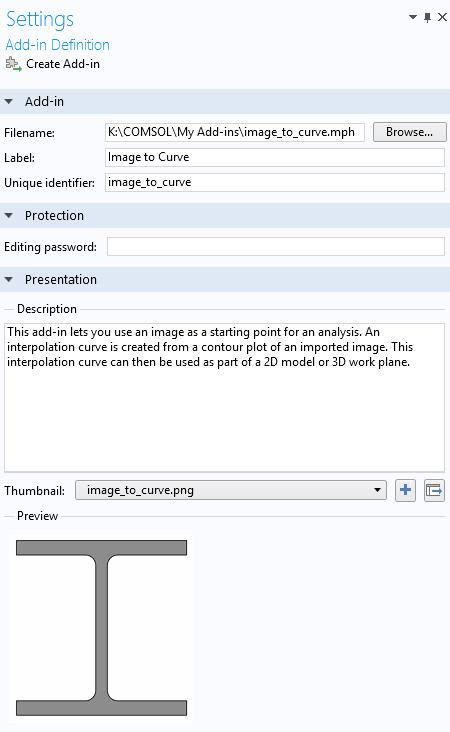
The Add-in Definition Settings window.
The Filename is the location of the add-in MPH file in the user-defined add-in library. This location can be on a shared network drive if you wish to share the add-in with your colleagues. The Label will be displayed in the Add-in Libraries window. The Unique identifier is what identifies the add-in and is intended to be unique for any COMSOL Multiphysics session. The unique identifier is recommended to be in a format similar to < company name > . < Add-in name > ; for example, my_company.my_add-in. The Editing password will be applied to the created add-in and is different from the editing password that you can specify in the root node Settings window of the MPH file used to create the add-in.
To create the add-in, which is a special type of MPH file, click the Create Add-in button.
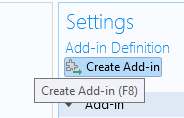
The Create Add-in button.
Add-In Libraries and Using Add-Ins
To use an add-in from the Add-in Libraries, you first need to enable it. In the Developer tab in the Model Builder, click Add-in Libraries.
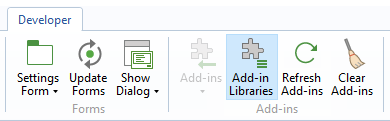
The Add-in Libraries button.
In the list of add-ins, select the checkboxes of the add-ins that you want to enable.
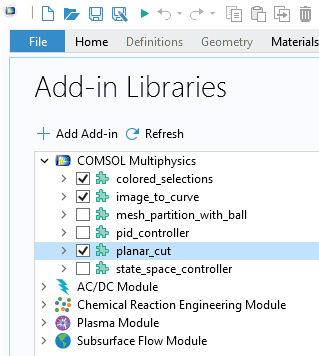
The Add-in Libraries window.
Once enabled, the corresponding add-ins will be displayed when clicking the Add-ins button in the Developer tab.
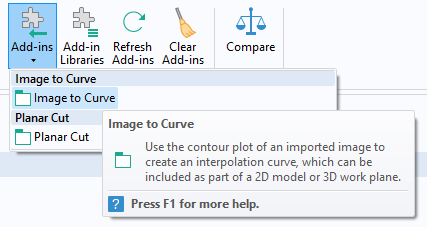
Accessing an add-in from the Developer tab.
The figure below shows the Settings Form for one of the built-in add-ins.
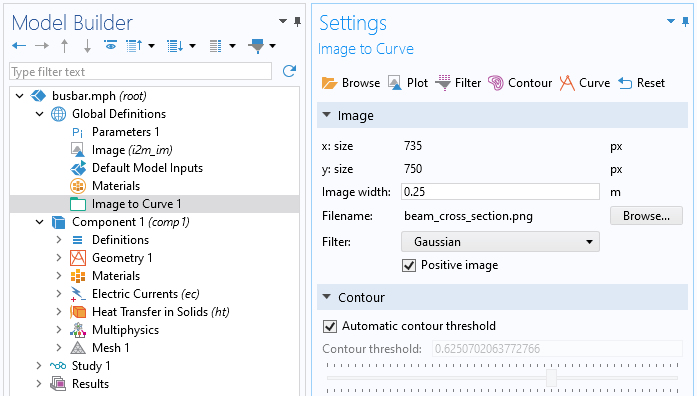
The settings for the Image to Curve add-in.
If you want to review and edit the Application Builder settings for a built-in add-in, you can open the corresponding MPH file. In a typical Windows® operating system installation, the built-in add-in library is located at:
C:\Program Files\COMSOL\COMSOL62\Multiphysics\addins.
You can browse to a user-defined add-in library by clicking the Add User Add-in Library button at the bottom of the Add-in Libraries window.

The Add User Add-in Library button.
The user-defined add-in library will be displayed alongside the built-in add-in libraries, as shown below.
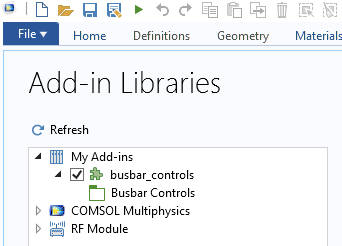
A user-defined add-in library.
Workflow when Creating and Editing Add-Ins
When creating and editing add-ins, you will find it useful to have two sessions of COMSOL Multiphysics open at the same time:
- One session for the original add-in MPH file, where you work mostly in the Application Builder
- One session for testing the add-in in the Model Builder
When testing an add-in using the Model Builder, make sure to test for a great variety of models, including models of different spatial dimensions as well as models with more than one model component. Use the Refresh Add-ins button to make sure you always use an updated version of the add-in you are editing.
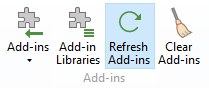
Refreshing add-ins.
Some Differences Between Applications and Add-Ins
There are many similarities between applications and add-ins, but there are also some important differences that are summarized in the following table.
| Topic | Application | Add-In |
|---|---|---|
| Target group | Anyone | Simulation experts |
| Development effort | Easy (for simple applications) | More elaborate |
| Model | One embedded model | Arbitrary user-defined model |
| Graphics | Multiple graphics windows | COMSOL Desktop® graphics window |
| Used with… | Compiled standalone applications, COMSOL Server™, COMSOL Multiphysics | COMSOL Multiphysics |
Whereas an application is typically built around one embedded model that you have full control over, an add-in needs to work for any model and modeling scenario that the user comes up with. Because of this, creating an add-in typically requires a bit more work than creating an application; of course, this depends on the complexity of the modeling task being addressed.
For example, an add-in needs safeguarding, such as checking:
- If there are multiple model components
- The spatial dimension of the current component: 0D, 1D, 2D, or 3D
- If things are empty
- That names are unique to avoid naming collisions
This is demonstrated in the built-in add-in library examples.
The Built-In Add-In Library
The built-in add-in library comes with several example add-ins that you can use as a starting point to quickly learn how to build your own add-ins. The examples illustrate how to create add-ins with custom methods, settings forms, and ribbon tabs. If you want to review and edit the settings for a built-in add-in, you can open the corresponding MPH file, which, in a typical Windows® installation, is located at: C:\Program Files\COMSOL\COMSOL62\Multiphysics\addins.

A model using the built-in Planar Cut add-in.

A model using the built-in Image to Curve add-in.
You can learn more about creating add-ins by reviewing the Introduction to Application Builder documentation.
Microsoft and Windows are either registered trademarks or trademarks of Microsoft Corporation in the United States and/or other countries.
Oracle and Java are registered trademarks of Oracle and/or its affiliates.


Comments (2)
Albert Zhykhar
October 2, 2020Thank you for this introduction!
Are there any plans to port/implement the Application Builder on Linux as well ?
Regards,
Albert
Bjorn Sjodin
October 6, 2020 COMSOL EmployeeHi Albert,
We currently have no plans for having the Application Builder on Linux.
Best regards,
Bjorn